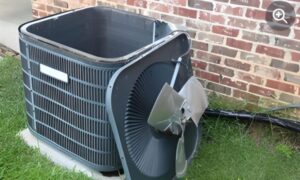
Is your air conditioner not working as well as it used to?
Are you experiencing higher electricity bills despite using your AC less often?
If so, your AC’s condenser coil may be to blame. Over time, dirt, debris, and other contaminants can build up on the coil, reducing its efficiency and causing your AC to work harder than necessary.
But don’t worry, with the right tools and a little bit of know-how, cleaning your AC’s condenser coil is a simple task that you can do yourself.
In this article, we’ll cover the importance of cleaning your AC’s condenser coil, the tools and materials you’ll need, the step-by-step process of cleaning, the precautions you should take, and the before and after effects of cleaning. So, let’s get started and get your AC back to its former glory!
Table of Contents
Condenser coil & its purpose
Air conditioning systems play a crucial role in keeping our homes and workplaces cool and comfortable during the hot summer months. One component of an AC unit that requires regular maintenance is the condenser coil.
The condenser coil of your is responsible for release heat from the refrigerant, which in turn allows the AC unit to operate efficiently.
Over time, the condenser coil can become clogged with dirt, debris, and other contaminants. This buildup restricts airflow, causing the AC unit to work harder to cool the air. As a result, the system’s energy consumption increases, and it becomes less effective at cooling your home.
Do You need to Clean Your Condenser Coil?
If you notice the following sign in your AC condenser unit that it’s time for cleaning the coils. These can include:
Reduced cooling performance: If your air conditioning system isn’t cooling your home as effectively as it used to, a dirty condenser coil may be to blame.
Higher energy bills: As mentioned, a dirty condenser coil can cause your AC unit to work harder than necessary, resulting in higher energy bills.
Strange noises: If you hear unusual sounds coming from your air conditioning system, it could be due to a dirty condenser coil.
Cleaning the condenser coil is a relatively simple process that can be done at home with the right tools and materials. It involves removing the outer panel of the AC unit, using a coil cleaner to break down the buildup, and then rinsing it off with water.
However, it’s important to note that proper safety precautions should be taken before attempting to clean the condenser coil. This includes turning off the power to the unit and wearing protective gear, such as gloves and goggles.
The tools and materials required for cleaning.
Air conditioner maintenance is an essential task that every homeowner should undertake to ensure their unit runs smoothly and lasts for years to come. One of the key components of AC maintenance is cleaning the condenser coil, and to do that, you need the right tools and materials.
The first tool you’ll need is a good quality air conditioner coil cleaner. There are many products available in the market, but it’s essential to choose a cleaner that is specifically designed for air conditioners.
Some of the popular brands include Nu-Calgon, Frost King, and Simple Green. These cleaners are formulated to remove dirt, grime, and other contaminants that can build up on the coil over time.
Apart from the cleaner, you’ll need a few other basic tools to get the job done. These include a garden hose, a soft-bristled brush, a bucket, and a pair of gloves. The garden hose is used to spray water on the coil to rinse off the cleaner and any dirt that has loosened.
The soft-bristled brush is used to gently scrub the coil to remove any stubborn debris that may be stuck.
It’s important to note that you should never use a pressure washer or a high-pressure hose to clean the coil, as this can damage the delicate fins and cause refrigerant leaks. Stick to a gentle stream of water from a garden hose and a soft brush to ensure that you don’t cause any damage while cleaning.
The precautions that need to be taken before cleaning
When it comes to cleaning the air conditioner condenser coil, it’s important to take some precautions to avoid any potential hazards or damage. Here are some essential precautions that you need to take before you begin cleaning:
Turn off the power: Before you start cleaning the condenser coil, make sure to turn off the power supply to the air conditioner unit. This will ensure your safety and prevent any electrical shocks.
Wear protective gear: It’s important to wear protective gear like gloves and safety glasses to protect your hands and eyes from debris, dust, and cleaning chemicals.
Check for any damage: Inspect the condenser coil for any damage or leaks. If you find any damage, make sure to address it before cleaning. Otherwise, you could cause further damage to the unit.
Clean the surrounding area: Clear any debris or obstructions around the unit to ensure that you have enough space to work safely.
Use appropriate cleaning products: Use the right cleaning products that are recommended for cleaning air conditioner condenser coils. Avoid using harsh chemicals that can damage the coil or pose a risk to your health.
The Process of Cleaning the Air Conditioner Condenser Coil

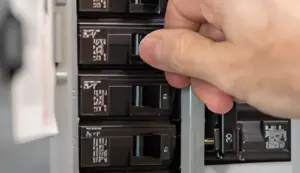
Step 1: Turn off the power
The first step in cleaning your air conditioner condenser coil is to turn off the power to your air conditioning system. You can do this by turning off the breaker or switch that controls the power to your air conditioner. This is an important safety precaution that will prevent you from getting electrocuted while you work.
Step 2: Remove the fan
Once you have turned off the power, you must remove the fan from the top of your air conditioning unit. You can do this by unscrewing the screws that hold the fan in place and gently lifting it out of the unit.
Step 3: Clean the coil
With the fan removed, you can now access the condenser coil. Use a soft brush or a coil cleaning brush to gently remove any debris that has accumulated on the coil. Be careful not to bend or damage the fins on the coil, as this can reduce its efficiency.
Step 4: Spray the coil
Once you have removed as much debris as possible from the coil, you can spray it with a coil cleaner. This will help to break down any remaining dirt and debris and make it easier to remove.
Step 5: Rinse the coil
 After allowing the coil cleaner to sit for a few minutes, rinse the coil thoroughly with a hose. Be sure to rinse from the inside out to ensure that all dirt and debris are removed.
Step 6: Reassemble the unit
Once you have finished cleaning the coil, you can reassemble the unit by putting the fan back in place and securing it with the screws. Be sure to turn the power back on to your air conditioning system and allow it to run for a few minutes to ensure that everything is working properly.
Benefits of cleaning AC condenser coils
Improved energy efficiency: Once your condenser coil is clean, your air conditioning system won’t have to work as hard to cool your home. This can lead to significant energy savings and lower utility bills.
Better cooling performance: A clean condenser coil allows air to flow freely through your AC unit, resulting in more effective cooling throughout your home.
Longer system lifespan: By maintaining your air conditioning system, including regular condenser coil cleanings, you can help extend the lifespan of your system and avoid costly repairs down the road.
Cleaning your air conditioner’s condenser coil requires a few simple tools and materials that are easy to obtain.
By investing a little time and effort into regular maintenance, you can keep your AC running smoothly and efficiently and increases the lifespan of your HVAC unit for years to come.
It is important to perform this task regularly to ensure that your air conditioner is working as efficiently as possible and to prevent costly repairs in the future.


